jueves, 31 de mayo de 2018

WebHook Trello en VSTS

Prerrequisitos
-Cuenta en VSTS
-Usuario en VSTS
-Usuario en Trello

1 Trello: Configurar cuenta

2.Creamos token de conexión

3. En VSTS en la opcion Service Hooks, creamos el service de trello

4. Válidamos la conexión

5. Una vez realizado el cambio en codigo fuente podemos visualizar el resultado en Trello


Tomado de: https://docs.microsoft.com/es-es/vsts/service-hooks/services/teams?view=vsts

sábado, 26 de mayo de 2018

Azure Ubuntu Server Docker sonar

Prerrequisitos: Tener suscripcion en Azure Manejo Comandos basicos
1- Crear Maquina Virtual Ubuntu ver https://docs.microsoft.com/en-us/azure/virtual-machines/linux/quick-create-portal
Ingresar por consola
ssh jimmy@104.46.115.93
2- Actualizar repositorio sudo apt-get update
3- Instalar Docker curl -sSL https://get.docker.com/ | sh
4- Reiniciar sudo reeboot
5- Instalar sonar docker pull sonarqube Nota si sale error: docker pull sonarqube Using default tag: latest Warning: failed to get default registry endpoint from daemon (Got permission denied while trying to connect to the Docker daemon socket at unix:///var/run/docker.sock: Get http://%2Fvar%2Frun%2Fdocker.sock/v1.37/info: dial unix /var/run/docker.sock: connect: permission denied). Using system default: https://index.docker.io/v1/ Got permission denied while trying to connect to the Docker daemon socket at unix:///var/run/docker.sock: Post http://%2Fvar%2Frun%2Fdocker.sock/v1.37/images/create?fromImage=sonarqube&tag=latest: dial unix /var/run/docker.sock: connect: permission denied Se debe reiniciar
6- Ejecutar sonar docker run -d --name sonarqube -p 9000:9000 -p 9092:9092 sonarqube
7- Aperturar puerto https://docs.microsoft.com/es-es/azure/virtual-machines/windows/nsg-quickstart-portal On the virtual machine, click the name of the Resource group. Select the network security group. The NSG can be identified using the Type column. On the left-hand menu, under settings, click Inbound security rules. Click on Add. In Name, type http. Make sure Source Port range is set to *, Destination Port range is set to 9000, and Action is set to Allow. Click OK.
En azure podemos configurar el nombre del dns
8- Resultado http://40.79.35.159:9000/projects

lunes, 7 de mayo de 2018

Crear WordPress Azure


1. Crear en Azure nuevo recurso WordPress

2. Ingresamos el nombre del sitio, usuario y password

3. Instalamos WordPress


4. Reiniciamos la aplicacion

5. Ingresamos al sitio

lunes, 5 de marzo de 2018

Extendiendo VSTS

Objetivo: Crear un plugin que me cargue el identificador de VSTS en un Campo: por ejemplo PMO1234
Prerrequisitos
Cuenta Visual Studio Team Services
Usuario para Publicar Extensión
Visual Studio Code
Node.js
1. Crear proyecto con la siguiente structura (Widget Microsoft)
├── README.md ├── sdk ├── node_modules └── scripts └── VSS.SDK.min.js ├── img └── logo.png ├── scripts ├── hello-world.html // html page to be used for your widget └── vss-extension.json // extension's manifest

2. Agregar las librerías requeridas VSS.SDK.js y VSS.SDK.min.js
3. Crear Archivo index.html, asociar las referencias y funcionalidad

4. Crear Archivo vss-extension.json con las propiedades base para publicar la extension (ver Microsoft)

5. Empaquetar extensión: tfx extension create --manifest-globs vss-extension.json
6. Cargar la Extensión en VSTS, en este aparte se debe compartir a que cuentas se comparte la extension en Share y asociar a Proyecto

Ingresar la url en el navegador con el identificador de la extensión https://marketplace.visualstudio.com/items?itemName=jimmym.id-widget
7. Resultado(Código Fuente)

jueves, 15 de junio de 2017

xml to Object

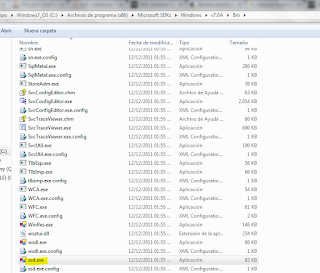
1. Ubicarse en la siguiente ruta
C:\Program Files (x86)\Microsoft SDKs\Windows\v7.0A\Bin\xsd.exe

2. Generar la clase a partir de un xsd con la siguiente instruccion
xsd.exe AssemblyRegistration.xsd /c

3. Gerear Xsd apartir de Xml C:\Program Files (x86)\Microsoft SDKs\Windows\v7.0A\Bin>xsd.exe "E:\Clientes\Ejemplo\DataOperaciones.xml"

martes, 7 de febrero de 2017

Test de Seguridad

Prerrequisitos:
- Windows Server 2008
- Java 8
- Jenkins 2.36
1) Descargar Owasp de la siguiente url https://www.owasp.org/index.php/OWASP_Zed_Attack_Proxy_Project
2) Instalar Owasp

3) Configurar Session

4) Instalar Plugin Jenkins

5) Configuracion


6) Resultado


domingo, 30 de octubre de 2016

Remote Pywinrm Rundeck

Prerrequisitos:
- Maquina Windows
habilitar winrm
- Maquina Linux
instalar python
1 Descargar Pywinrm
$ pip install pywinrm
-Kerberos
$ pip install pywinrm[kerberos]
tomado de:https://github.com/diyan/pywinrm
2 Creamos script en python
#! /usr/bin/python import winrm print ("hola mundo python") s = winrm.Session('192.168.0.28', auth=('cabunga', 'jimmy')) r = s.run_cmd('ipconfig', ['/all']) r.status_code r.std_out print ("fin python"+r.std_out)


3 verificar conexion con Maquina windows
Maquina Virtual

4 Crear proyecto Rundeck
5 Crear Job
6 Validar resultado